

Mark Sze
Software Engineer at AG2.ai

Tvrtko Sternak
Machine Learning Engineer at Airt

Davor Runje
CTO at Airt

Davorin Ruševljan
Developer
 **TL;DR:**
* **Demo implementation**: Implement a website using websockets and communicate using voice with the [**`RealtimeAgent`**](/docs/api-reference/autogen/agentchat/realtime/experimental/RealtimeAgent)
* **Introducing [**`WebSocketAudioAdapter`**](/docs/api-reference/autogen/agentchat/realtime/experimental/WebSocketAudioAdapter#websocketaudioadapter)**: Stream audio directly from your browser using [WebSockets](https://fastapi.tiangolo.com/advanced/websockets/).
* **Simplified Development**: Connect to real-time agents quickly and effortlessly with minimal setup.
# **Realtime over WebSockets**
In our [previous blog post](/docs/blog/2024-12-20-RealtimeAgent/index), we introduced a way to interact with the [**`RealtimeAgent`**](/docs/api-reference/autogen/agentchat/realtime/experimental/RealtimeAgent) using [**`TwilioAudioAdapter`**](/docs/api-reference/autogen/agentchat/realtime/experimental/TwilioAudioAdapter#twilioaudioadapter). While effective, this approach required a setup-intensive process involving [Twilio](https://www.twilio.com/) integration, account configuration, number forwarding, and other complexities. Today, we're excited to introduce the[**`WebSocketAudioAdapter`**](/docs/api-reference/autogen/agentchat/realtime/experimental/WebSocketAudioAdapter#websocketaudioadapter), a streamlined approach to real-time audio streaming directly via a web browser.
This post explores the features, benefits, and implementation of the [**`WebSocketAudioAdapter`**](/docs/api-reference/autogen/agentchat/realtime/experimental/WebSocketAudioAdapter#websocketaudioadapter), showing how it transforms the way we connect with real-time agents.
## **Why We Built the [**`WebSocketAudioAdapter`**](/docs/api-reference/autogen/agentchat/realtime/experimental/WebSocketAudioAdapter#websocketaudioadapter)**
### **Challenges with Existing Solutions**
Previously introduced [**`TwilioAudioAdapter`**](/docs/api-reference/autogen/agentchat/realtime/experimental/TwilioAudioAdapter#twilioaudioadapter) provides a robust way to connect to your [**`RealtimeAgent`**](/docs/api-reference/autogen/agentchat/realtime/experimental/RealtimeAgent), but it comes with challenges:
* **Browser Limitations**: For teams building web-first applications, integrating with a telephony platform can feel redundant.
* **Complex Setup**: Configuring Twilio accounts, verifying numbers, and setting up forwarding can be time-consuming.
* **Platform Dependency**: This solution requires developers to rely on external API, which adds latency and costs.
### **Our Solution**
The [**`WebSocketAudioAdapter`**](/docs/api-reference/autogen/agentchat/realtime/experimental/WebSocketAudioAdapter#websocketaudioadapter) eliminates these challenges by allowing direct audio streaming over [WebSockets](https://fastapi.tiangolo.com/advanced/websockets/). It integrates seamlessly with modern web technologies, enabling real-time voice interactions without external telephony platforms.
## **How It Works**
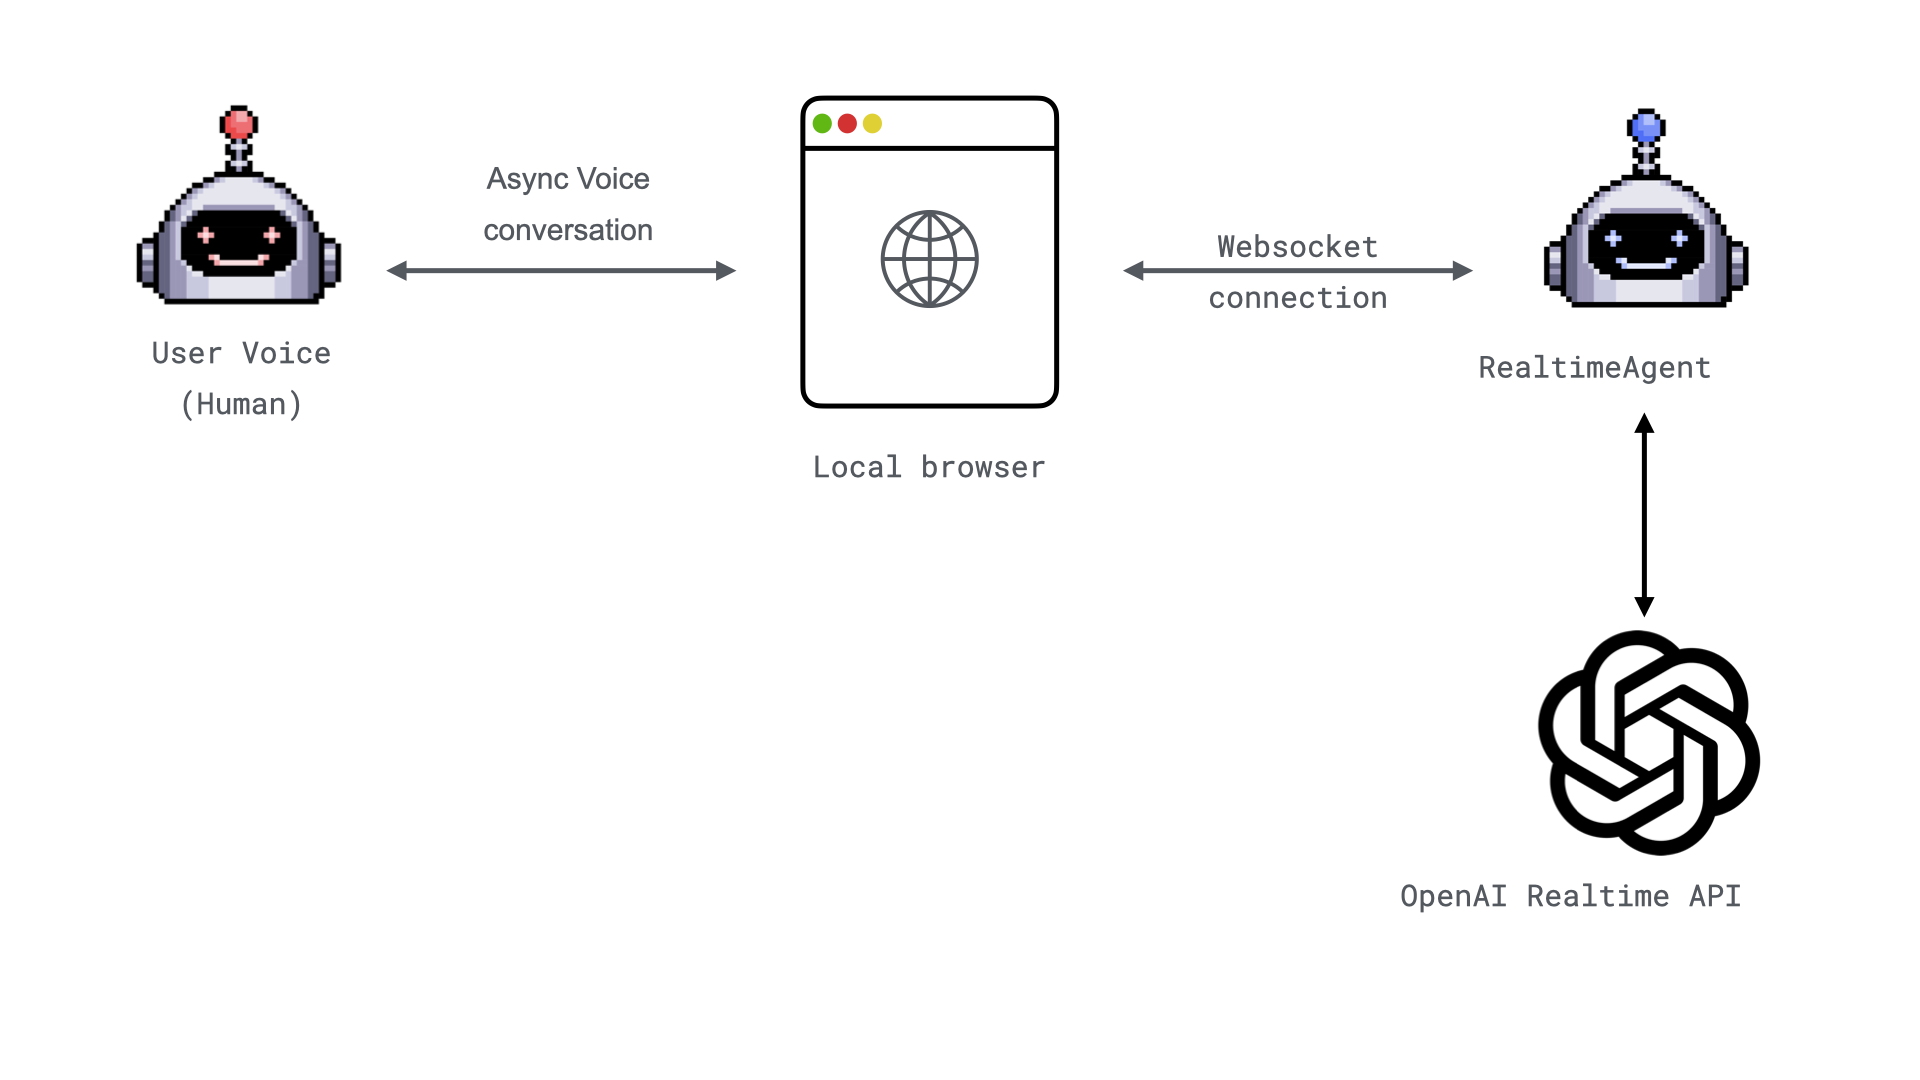
At its core, the [**`WebSocketAudioAdapter`**](/docs/api-reference/autogen/agentchat/realtime/experimental/WebSocketAudioAdapter#websocketaudioadapter) leverages [WebSockets](https://fastapi.tiangolo.com/advanced/websockets/) to handle real-time audio streaming. This means your browser becomes the communication bridge, sending audio packets to a server where a [**`RealtimeAgent`**](/docs/api-reference/autogen/agentchat/realtime/experimental/RealtimeAgent) agent processes them.
Here’s a quick overview of its components and how they fit together:
1. **WebSocket Connection**:
* The adapter establishes a [WebSockets](https://fastapi.tiangolo.com/advanced/websockets/) connection between the client (browser) and the server.
* Audio packets are streamed in real time through this connection.
2. **Integration with FastAPI**:
* Using Python's [FastAPI](https://fastapi.tiangolo.com/) framework, developers can easily set up endpoints for handling [WebSockets](https://fastapi.tiangolo.com/advanced/websockets/) traffic.
3. **Powered by Realtime Agents**:
* The audio adapter integrates with an AI-powered [**`RealtimeAgent`**](/docs/api-reference/autogen/agentchat/realtime/experimental/RealtimeAgent), allowing the agent to process audio inputs and respond intelligently.
## **Key Features**
### **1. Simplified Setup**
Unlike [**`TwilioAudioAdapter`**](/docs/api-reference/autogen/agentchat/realtime/experimental/TwilioAudioAdapter#twilioaudioadapter), the [**`WebSocketAudioAdapter`**](/docs/api-reference/autogen/agentchat/realtime/experimental/WebSocketAudioAdapter#websocketaudioadapter) requires no phone numbers, no telephony configuration, and no external accounts. It's a plug-and-play solution.
### **2. Real-Time Performance**
By streaming audio over [WebSockets](https://fastapi.tiangolo.com/advanced/websockets/), the adapter ensures low latency, making conversations feel natural and seamless.
### **3. Browser-Based**
Everything happens within the user's browser, meaning no additional software is required. This makes it ideal for web applications.
### **4. Flexible Integration**
Whether you're building a chatbot, a voice assistant, or an interactive application, the adapter can integrate easily with existing frameworks and AI systems.
## **Example: Build a Voice-Enabled Weather Bot**
Let’s walk through a practical example where we use the [**`WebSocketAudioAdapter`**](/docs/api-reference/autogen/agentchat/realtime/experimental/WebSocketAudioAdapter#websocketaudioadapter) to create a voice-enabled weather bot.
You can find the full example [here](https://github.com/ag2ai/realtime-agent-over-websockets/tree/main).
To run the demo example, follow these steps:
### **1. Clone the Repository**
```bash theme={null}
git clone https://github.com/ag2ai/realtime-agent-over-websockets.git
cd realtime-agent-over-websockets
```
### **2. Set Up Environment Variables**
Create a `OAI_CONFIG_LIST` file based on the provided `OAI_CONFIG_LIST_sample`:
```bash theme={null}
cp OAI_CONFIG_LIST_sample OAI_CONFIG_LIST
```
In the OAI\_CONFIG\_LIST file, update the `api_key` to your OpenAI and/or Gemini API keys.
### (Optional) Create and use a virtual environment
To reduce cluttering your global Python environment on your machine, you can create a virtual environment. On your command line, enter:
```
python3 -m venv env
source env/bin/activate
```
### **3. Install Dependencies**
Install the required Python packages using `pip`:
```bash theme={null}
pip install -r requirements.txt
```
### **4. Start the Server**
Run the application with Uvicorn:
```bash theme={null}
uvicorn realtime_over_websockets.main:app --port 5050
```
After you start the server you should see your application running in the logs:
```bash theme={null}
INFO: Started server process [64425]
INFO: Waiting for application startup.
INFO: Application startup complete.
INFO: Uvicorn running on http://0.0.0.0:5050 (Press CTRL+C to quit)
```
### Ready to Chat? 🚀
Now you can simply open [**localhost:5050/start-chat**](http://localhost:5050/start-chat) in your browser, and dive into an interactive conversation with the [**`RealtimeAgent`**](/docs/api-reference/autogen/agentchat/realtime/experimental/RealtimeAgent)! 🎤✨
**TL;DR:**
* **Demo implementation**: Implement a website using websockets and communicate using voice with the [**`RealtimeAgent`**](/docs/api-reference/autogen/agentchat/realtime/experimental/RealtimeAgent)
* **Introducing [**`WebSocketAudioAdapter`**](/docs/api-reference/autogen/agentchat/realtime/experimental/WebSocketAudioAdapter#websocketaudioadapter)**: Stream audio directly from your browser using [WebSockets](https://fastapi.tiangolo.com/advanced/websockets/).
* **Simplified Development**: Connect to real-time agents quickly and effortlessly with minimal setup.
# **Realtime over WebSockets**
In our [previous blog post](/docs/blog/2024-12-20-RealtimeAgent/index), we introduced a way to interact with the [**`RealtimeAgent`**](/docs/api-reference/autogen/agentchat/realtime/experimental/RealtimeAgent) using [**`TwilioAudioAdapter`**](/docs/api-reference/autogen/agentchat/realtime/experimental/TwilioAudioAdapter#twilioaudioadapter). While effective, this approach required a setup-intensive process involving [Twilio](https://www.twilio.com/) integration, account configuration, number forwarding, and other complexities. Today, we're excited to introduce the[**`WebSocketAudioAdapter`**](/docs/api-reference/autogen/agentchat/realtime/experimental/WebSocketAudioAdapter#websocketaudioadapter), a streamlined approach to real-time audio streaming directly via a web browser.
This post explores the features, benefits, and implementation of the [**`WebSocketAudioAdapter`**](/docs/api-reference/autogen/agentchat/realtime/experimental/WebSocketAudioAdapter#websocketaudioadapter), showing how it transforms the way we connect with real-time agents.
## **Why We Built the [**`WebSocketAudioAdapter`**](/docs/api-reference/autogen/agentchat/realtime/experimental/WebSocketAudioAdapter#websocketaudioadapter)**
### **Challenges with Existing Solutions**
Previously introduced [**`TwilioAudioAdapter`**](/docs/api-reference/autogen/agentchat/realtime/experimental/TwilioAudioAdapter#twilioaudioadapter) provides a robust way to connect to your [**`RealtimeAgent`**](/docs/api-reference/autogen/agentchat/realtime/experimental/RealtimeAgent), but it comes with challenges:
* **Browser Limitations**: For teams building web-first applications, integrating with a telephony platform can feel redundant.
* **Complex Setup**: Configuring Twilio accounts, verifying numbers, and setting up forwarding can be time-consuming.
* **Platform Dependency**: This solution requires developers to rely on external API, which adds latency and costs.
### **Our Solution**
The [**`WebSocketAudioAdapter`**](/docs/api-reference/autogen/agentchat/realtime/experimental/WebSocketAudioAdapter#websocketaudioadapter) eliminates these challenges by allowing direct audio streaming over [WebSockets](https://fastapi.tiangolo.com/advanced/websockets/). It integrates seamlessly with modern web technologies, enabling real-time voice interactions without external telephony platforms.
## **How It Works**
At its core, the [**`WebSocketAudioAdapter`**](/docs/api-reference/autogen/agentchat/realtime/experimental/WebSocketAudioAdapter#websocketaudioadapter) leverages [WebSockets](https://fastapi.tiangolo.com/advanced/websockets/) to handle real-time audio streaming. This means your browser becomes the communication bridge, sending audio packets to a server where a [**`RealtimeAgent`**](/docs/api-reference/autogen/agentchat/realtime/experimental/RealtimeAgent) agent processes them.
Here’s a quick overview of its components and how they fit together:
1. **WebSocket Connection**:
* The adapter establishes a [WebSockets](https://fastapi.tiangolo.com/advanced/websockets/) connection between the client (browser) and the server.
* Audio packets are streamed in real time through this connection.
2. **Integration with FastAPI**:
* Using Python's [FastAPI](https://fastapi.tiangolo.com/) framework, developers can easily set up endpoints for handling [WebSockets](https://fastapi.tiangolo.com/advanced/websockets/) traffic.
3. **Powered by Realtime Agents**:
* The audio adapter integrates with an AI-powered [**`RealtimeAgent`**](/docs/api-reference/autogen/agentchat/realtime/experimental/RealtimeAgent), allowing the agent to process audio inputs and respond intelligently.
## **Key Features**
### **1. Simplified Setup**
Unlike [**`TwilioAudioAdapter`**](/docs/api-reference/autogen/agentchat/realtime/experimental/TwilioAudioAdapter#twilioaudioadapter), the [**`WebSocketAudioAdapter`**](/docs/api-reference/autogen/agentchat/realtime/experimental/WebSocketAudioAdapter#websocketaudioadapter) requires no phone numbers, no telephony configuration, and no external accounts. It's a plug-and-play solution.
### **2. Real-Time Performance**
By streaming audio over [WebSockets](https://fastapi.tiangolo.com/advanced/websockets/), the adapter ensures low latency, making conversations feel natural and seamless.
### **3. Browser-Based**
Everything happens within the user's browser, meaning no additional software is required. This makes it ideal for web applications.
### **4. Flexible Integration**
Whether you're building a chatbot, a voice assistant, or an interactive application, the adapter can integrate easily with existing frameworks and AI systems.
## **Example: Build a Voice-Enabled Weather Bot**
Let’s walk through a practical example where we use the [**`WebSocketAudioAdapter`**](/docs/api-reference/autogen/agentchat/realtime/experimental/WebSocketAudioAdapter#websocketaudioadapter) to create a voice-enabled weather bot.
You can find the full example [here](https://github.com/ag2ai/realtime-agent-over-websockets/tree/main).
To run the demo example, follow these steps:
### **1. Clone the Repository**
```bash theme={null}
git clone https://github.com/ag2ai/realtime-agent-over-websockets.git
cd realtime-agent-over-websockets
```
### **2. Set Up Environment Variables**
Create a `OAI_CONFIG_LIST` file based on the provided `OAI_CONFIG_LIST_sample`:
```bash theme={null}
cp OAI_CONFIG_LIST_sample OAI_CONFIG_LIST
```
In the OAI\_CONFIG\_LIST file, update the `api_key` to your OpenAI and/or Gemini API keys.
### (Optional) Create and use a virtual environment
To reduce cluttering your global Python environment on your machine, you can create a virtual environment. On your command line, enter:
```
python3 -m venv env
source env/bin/activate
```
### **3. Install Dependencies**
Install the required Python packages using `pip`:
```bash theme={null}
pip install -r requirements.txt
```
### **4. Start the Server**
Run the application with Uvicorn:
```bash theme={null}
uvicorn realtime_over_websockets.main:app --port 5050
```
After you start the server you should see your application running in the logs:
```bash theme={null}
INFO: Started server process [64425]
INFO: Waiting for application startup.
INFO: Application startup complete.
INFO: Uvicorn running on http://0.0.0.0:5050 (Press CTRL+C to quit)
```
### Ready to Chat? 🚀
Now you can simply open [**localhost:5050/start-chat**](http://localhost:5050/start-chat) in your browser, and dive into an interactive conversation with the [**`RealtimeAgent`**](/docs/api-reference/autogen/agentchat/realtime/experimental/RealtimeAgent)! 🎤✨
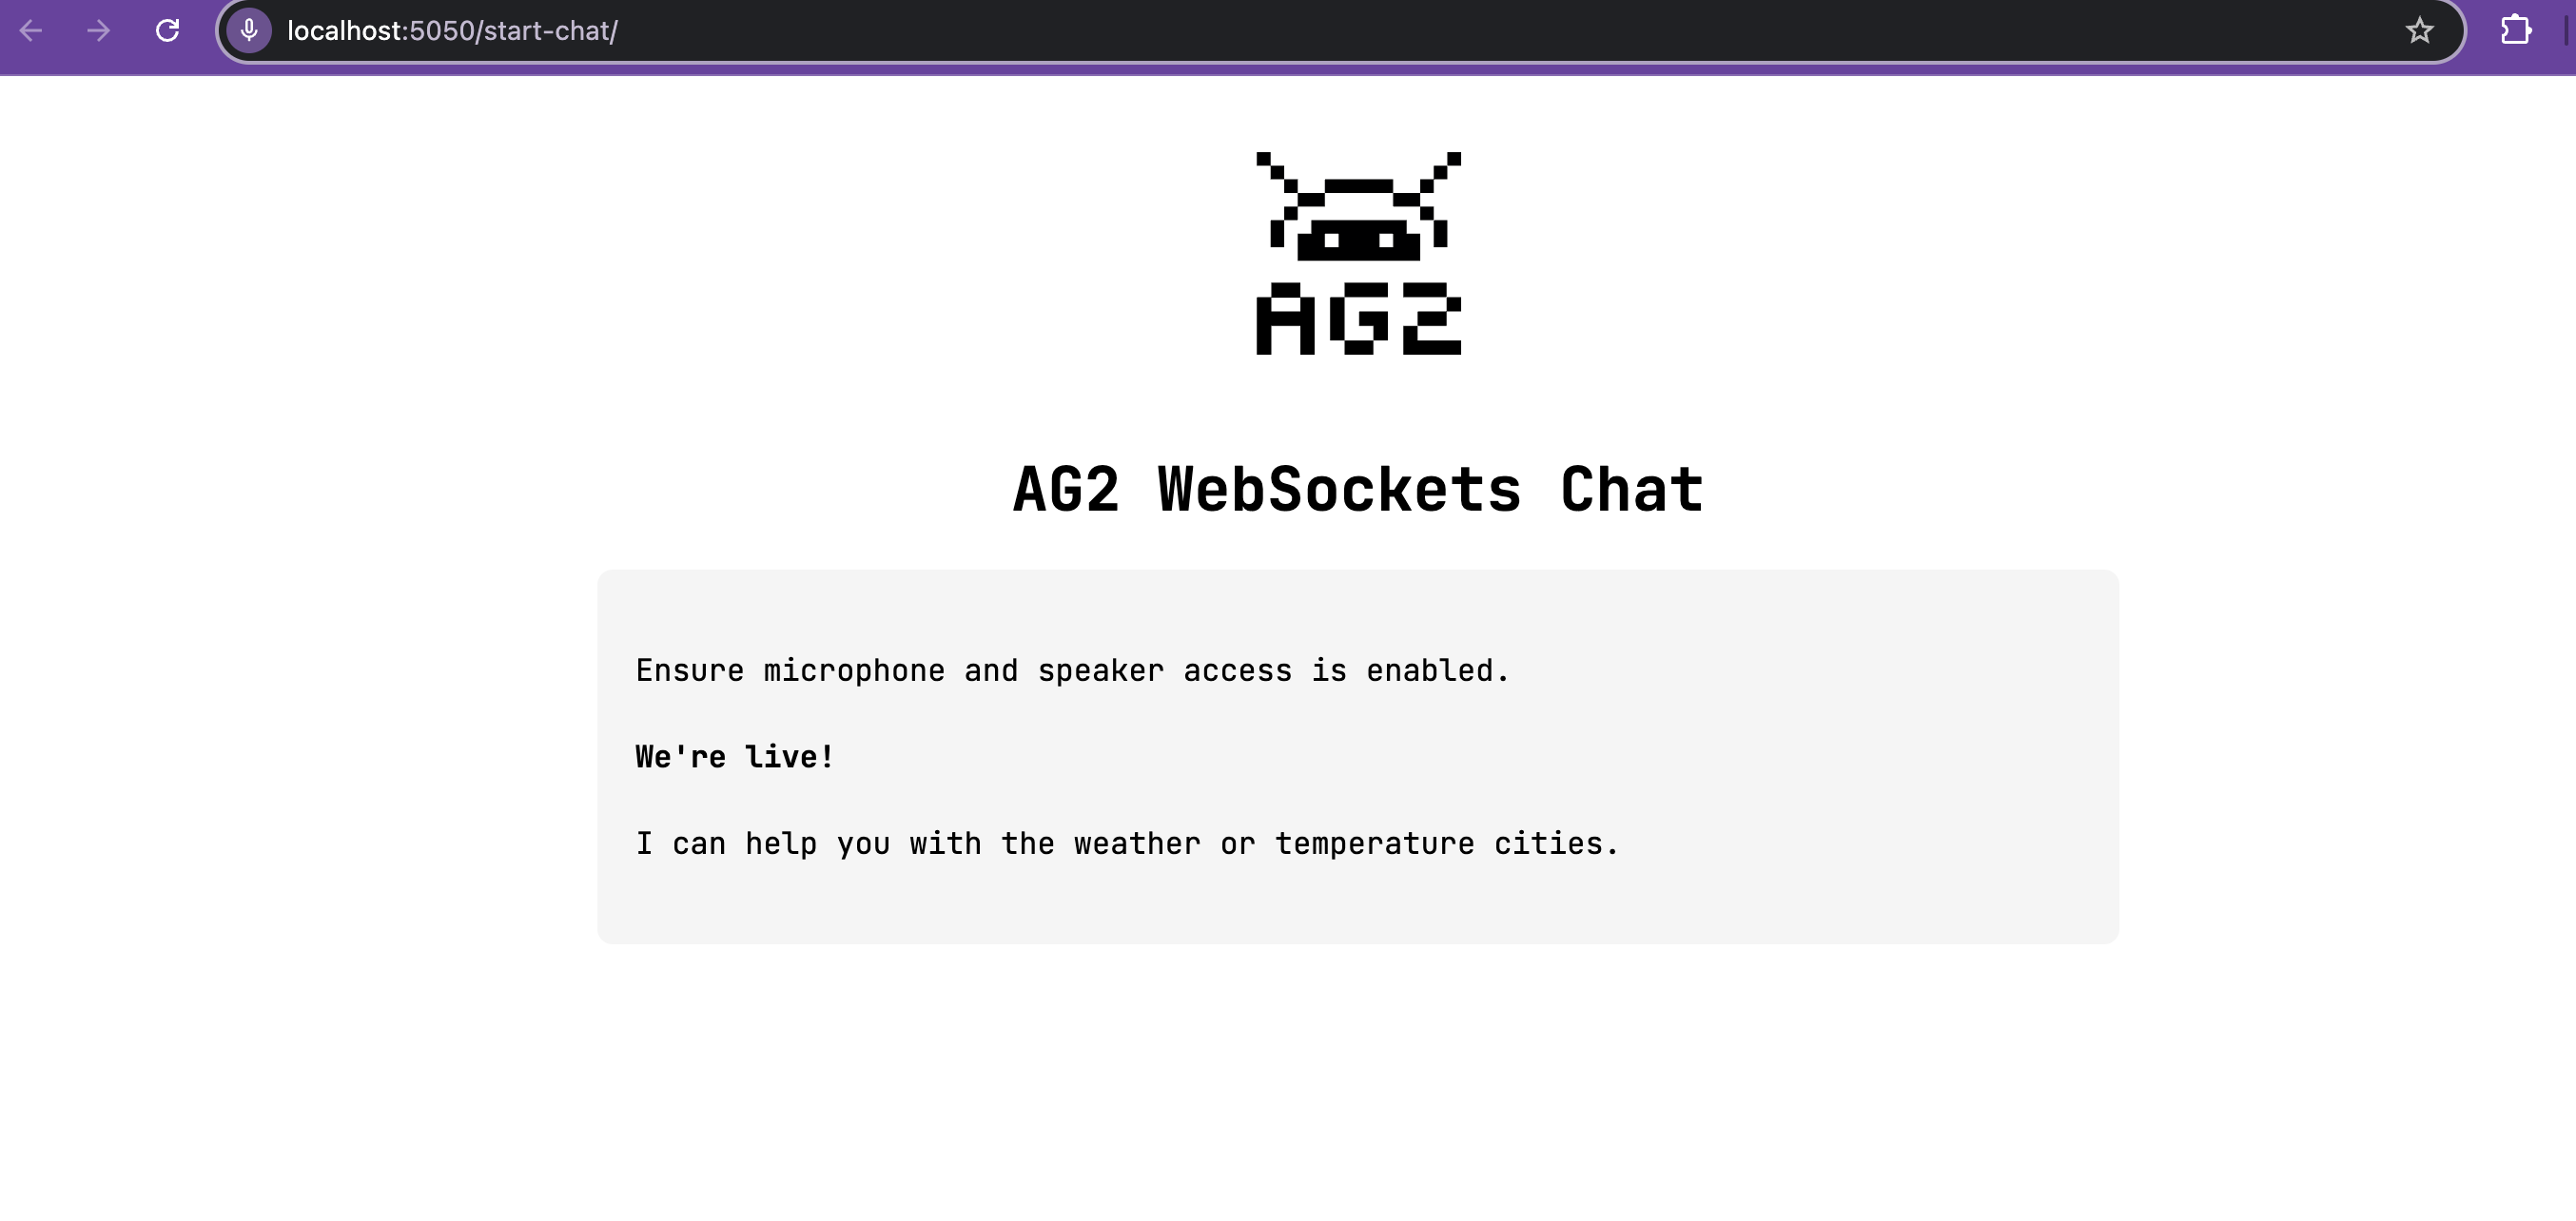 To get started, simply speak into your microphone and ask a question. For example, you can say:
**"What's the weather like in Seattle?"**
This initial question will activate the agent, and it will respond, showcasing its ability to understand and interact with you in real time.
## Code review
Let’s dive in and break down how this example works—from setting up the server to handling real-time audio streaming with [WebSockets](https://fastapi.tiangolo.com/advanced/websockets/).
### **Set Up the FastAPI app**
We use [FastAPI](https://fastapi.tiangolo.com/) to serve the chat interface and handle WebSocket connections. A key part is configuring the server to load and render HTML templates dynamically for the user interface.
* **Template Loading**: Use `Jinja2Templates` to load `chat.html` from the `templates` directory. The template is dynamically rendered with variables like the server's `port`.
* **Static Files**: Serve assets (e.g., JavaScript, CSS) from the `static` directory.
```python theme={null}
app = FastAPI()
@app.get("/", response_class=JSONResponse)
async def index_page() -> dict[str, str]:
return {"message": "WebSocket Audio Stream Server is running!"}
website_files_path = Path(__file__).parent / "website_files"
app.mount(
"/static", StaticFiles(directory=website_files_path / "static"), name="static"
)
templates = Jinja2Templates(directory=website_files_path / "templates")
@app.get("/start-chat/", response_class=HTMLResponse)
async def start_chat(request: Request) -> HTMLResponse:
"""Endpoint to return the HTML page for audio chat."""
port = request.url.port
return templates.TemplateResponse("chat.html", {"request": request, "port": port})
```
### Defining the WebSocket Endpoint
The `/media-stream` WebSocket route is where real-time audio interaction is processed and streamed to the AI assistant. Let’s break it down step-by-step:
1. **Accept the WebSocket Connection**
The WebSocket connection is established when a client connects to `/media-stream`. Using `await websocket.accept()`, we ensure the connection is live and ready for communication.
```python theme={null}
@app.websocket("/media-stream")
async def handle_media_stream(websocket: WebSocket) -> None:
"""Handle WebSocket connections providing audio stream and OpenAI."""
await websocket.accept()
```
2. **Initialize Logging**
A logger instance (`getLogger("uvicorn.error")`) is set up to monitor and debug the server's activities, helping track events during the connection and interaction process.
```python theme={null}
logger = getLogger("uvicorn.error")
```
3. **Set Up the `WebSocketAudioAdapter`**
The [**`WebSocketAudioAdapter`**](/docs/api-reference/autogen/agentchat/realtime/experimental/WebSocketAudioAdapter#websocketaudioadapter) bridges the client’s audio stream with the [**`RealtimeAgent`**](/docs/api-reference/autogen/agentchat/realtime/experimental/RealtimeAgent). It streams audio data over [WebSockets](https://fastapi.tiangolo.com/advanced/websockets/) in real time, ensuring seamless communication between the browser and the agent.
```python theme={null}
audio_adapter = WebSocketAudioAdapter(websocket, logger=logger)
```
4. **Configure the Realtime Agent**
The `RealtimeAgent` is the AI assistant driving the interaction. Key parameters include:
* **Name**: The agent identity, here called `"Weather Bot"`.
* **System Message**: System message for the agent.
* **Language Model Configuration**: Defined by `realtime_llm_config` for LLM settings.
* **Audio Adapter**: Connects the [**`WebSocketAudioAdapter`**](/docs/api-reference/autogen/agentchat/realtime/experimental/WebSocketAudioAdapter#websocketaudioadapter) for handling audio.
* **Logger**: Logs the agent's activities for better observability.
```python theme={null}
realtime_agent = RealtimeAgent(
name="Weather Bot",
system_message="Hello there! I am an AI voice assistant powered by Autogen and the OpenAI Realtime API. You can ask me about weather, jokes, or anything you can imagine. Start by saying 'How can I help you'?",
llm_config=realtime_llm_config,
audio_adapter=audio_adapter,
logger=logger,
)
```
5. **Define a Custom Realtime Function**
The `get_weather` function is registered as a realtime callable function. When the user asks about the weather, the agent can call the function to get an accurate weather report and respond based on the provided information:
* Returns `"The weather is cloudy."` for `"Seattle"`.
* Returns `"The weather is sunny."` for other locations.
```python theme={null}
@realtime_agent.register_realtime_function( # type: ignore [misc]
name="get_weather", description="Get the current weather"
)
def get_weather(location: Annotated[str, "city"]) -> str:
return (
"The weather is cloudy."
if location == "Seattle"
else "The weather is sunny."
)
```
6. **Run the Realtime Agent**
The `await realtime_agent.run()` method starts the agent, handling incoming audio streams, processing user queries, and responding in real time.
Here is the full code for the `/media-stream` endpoint:
```python theme={null}
@app.websocket("/media-stream")
async def handle_media_stream(websocket: WebSocket) -> None:
"""Handle WebSocket connections providing audio stream and OpenAI."""
await websocket.accept()
logger = getLogger("uvicorn.error")
audio_adapter = WebSocketAudioAdapter(websocket, logger=logger)
realtime_agent = RealtimeAgent(
name="Weather Bot",
system_message="Hello there! I am an AI voice assistant powered by Autogen and the OpenAI Realtime API. You can ask me about weather, jokes, or anything you can imagine. Start by saying 'How can I help you'?",
llm_config=realtime_llm_config,
audio_adapter=audio_adapter,
logger=logger,
)
@realtime_agent.register_realtime_function( # type: ignore [misc]
name="get_weather", description="Get the current weather"
)
def get_weather(location: Annotated[str, "city"]) -> str:
return (
"The weather is cloudy."
if location == "Seattle"
else "The weather is sunny."
)
await realtime_agent.run()
```
## **Benefits in Action**
* **Quick Prototyping**: Spin up a real-time voice application in minutes.
* **Cost Efficiency**: Eliminate third-party telephony costs.
* **User-Friendly**: Runs in the browser, making it accessible to anyone with a microphone.
## **Conclusion**
The [**`WebSocketAudioAdapter`**](/docs/api-reference/autogen/agentchat/realtime/experimental/WebSocketAudioAdapter#websocketaudioadapter) marks a shift toward simpler, more accessible real-time audio solutions. It empowers developers to build and deploy voice applications faster and more efficiently. Whether you're creating an AI assistant, a voice-enabled app, or an experimental project, this adapter is your go-to tool for real-time audio streaming.
Try it out and bring your voice-enabled ideas to life!
To get started, simply speak into your microphone and ask a question. For example, you can say:
**"What's the weather like in Seattle?"**
This initial question will activate the agent, and it will respond, showcasing its ability to understand and interact with you in real time.
## Code review
Let’s dive in and break down how this example works—from setting up the server to handling real-time audio streaming with [WebSockets](https://fastapi.tiangolo.com/advanced/websockets/).
### **Set Up the FastAPI app**
We use [FastAPI](https://fastapi.tiangolo.com/) to serve the chat interface and handle WebSocket connections. A key part is configuring the server to load and render HTML templates dynamically for the user interface.
* **Template Loading**: Use `Jinja2Templates` to load `chat.html` from the `templates` directory. The template is dynamically rendered with variables like the server's `port`.
* **Static Files**: Serve assets (e.g., JavaScript, CSS) from the `static` directory.
```python theme={null}
app = FastAPI()
@app.get("/", response_class=JSONResponse)
async def index_page() -> dict[str, str]:
return {"message": "WebSocket Audio Stream Server is running!"}
website_files_path = Path(__file__).parent / "website_files"
app.mount(
"/static", StaticFiles(directory=website_files_path / "static"), name="static"
)
templates = Jinja2Templates(directory=website_files_path / "templates")
@app.get("/start-chat/", response_class=HTMLResponse)
async def start_chat(request: Request) -> HTMLResponse:
"""Endpoint to return the HTML page for audio chat."""
port = request.url.port
return templates.TemplateResponse("chat.html", {"request": request, "port": port})
```
### Defining the WebSocket Endpoint
The `/media-stream` WebSocket route is where real-time audio interaction is processed and streamed to the AI assistant. Let’s break it down step-by-step:
1. **Accept the WebSocket Connection**
The WebSocket connection is established when a client connects to `/media-stream`. Using `await websocket.accept()`, we ensure the connection is live and ready for communication.
```python theme={null}
@app.websocket("/media-stream")
async def handle_media_stream(websocket: WebSocket) -> None:
"""Handle WebSocket connections providing audio stream and OpenAI."""
await websocket.accept()
```
2. **Initialize Logging**
A logger instance (`getLogger("uvicorn.error")`) is set up to monitor and debug the server's activities, helping track events during the connection and interaction process.
```python theme={null}
logger = getLogger("uvicorn.error")
```
3. **Set Up the `WebSocketAudioAdapter`**
The [**`WebSocketAudioAdapter`**](/docs/api-reference/autogen/agentchat/realtime/experimental/WebSocketAudioAdapter#websocketaudioadapter) bridges the client’s audio stream with the [**`RealtimeAgent`**](/docs/api-reference/autogen/agentchat/realtime/experimental/RealtimeAgent). It streams audio data over [WebSockets](https://fastapi.tiangolo.com/advanced/websockets/) in real time, ensuring seamless communication between the browser and the agent.
```python theme={null}
audio_adapter = WebSocketAudioAdapter(websocket, logger=logger)
```
4. **Configure the Realtime Agent**
The `RealtimeAgent` is the AI assistant driving the interaction. Key parameters include:
* **Name**: The agent identity, here called `"Weather Bot"`.
* **System Message**: System message for the agent.
* **Language Model Configuration**: Defined by `realtime_llm_config` for LLM settings.
* **Audio Adapter**: Connects the [**`WebSocketAudioAdapter`**](/docs/api-reference/autogen/agentchat/realtime/experimental/WebSocketAudioAdapter#websocketaudioadapter) for handling audio.
* **Logger**: Logs the agent's activities for better observability.
```python theme={null}
realtime_agent = RealtimeAgent(
name="Weather Bot",
system_message="Hello there! I am an AI voice assistant powered by Autogen and the OpenAI Realtime API. You can ask me about weather, jokes, or anything you can imagine. Start by saying 'How can I help you'?",
llm_config=realtime_llm_config,
audio_adapter=audio_adapter,
logger=logger,
)
```
5. **Define a Custom Realtime Function**
The `get_weather` function is registered as a realtime callable function. When the user asks about the weather, the agent can call the function to get an accurate weather report and respond based on the provided information:
* Returns `"The weather is cloudy."` for `"Seattle"`.
* Returns `"The weather is sunny."` for other locations.
```python theme={null}
@realtime_agent.register_realtime_function( # type: ignore [misc]
name="get_weather", description="Get the current weather"
)
def get_weather(location: Annotated[str, "city"]) -> str:
return (
"The weather is cloudy."
if location == "Seattle"
else "The weather is sunny."
)
```
6. **Run the Realtime Agent**
The `await realtime_agent.run()` method starts the agent, handling incoming audio streams, processing user queries, and responding in real time.
Here is the full code for the `/media-stream` endpoint:
```python theme={null}
@app.websocket("/media-stream")
async def handle_media_stream(websocket: WebSocket) -> None:
"""Handle WebSocket connections providing audio stream and OpenAI."""
await websocket.accept()
logger = getLogger("uvicorn.error")
audio_adapter = WebSocketAudioAdapter(websocket, logger=logger)
realtime_agent = RealtimeAgent(
name="Weather Bot",
system_message="Hello there! I am an AI voice assistant powered by Autogen and the OpenAI Realtime API. You can ask me about weather, jokes, or anything you can imagine. Start by saying 'How can I help you'?",
llm_config=realtime_llm_config,
audio_adapter=audio_adapter,
logger=logger,
)
@realtime_agent.register_realtime_function( # type: ignore [misc]
name="get_weather", description="Get the current weather"
)
def get_weather(location: Annotated[str, "city"]) -> str:
return (
"The weather is cloudy."
if location == "Seattle"
else "The weather is sunny."
)
await realtime_agent.run()
```
## **Benefits in Action**
* **Quick Prototyping**: Spin up a real-time voice application in minutes.
* **Cost Efficiency**: Eliminate third-party telephony costs.
* **User-Friendly**: Runs in the browser, making it accessible to anyone with a microphone.
## **Conclusion**
The [**`WebSocketAudioAdapter`**](/docs/api-reference/autogen/agentchat/realtime/experimental/WebSocketAudioAdapter#websocketaudioadapter) marks a shift toward simpler, more accessible real-time audio solutions. It empowers developers to build and deploy voice applications faster and more efficiently. Whether you're creating an AI assistant, a voice-enabled app, or an experimental project, this adapter is your go-to tool for real-time audio streaming.
Try it out and bring your voice-enabled ideas to life!